如何使用CSS来处理第一个样式的方法

在前端开发中,经常会遇到需要对第一个元素进行特殊样式处理的情况。这时候,我们可以利用CSS中的伪类选择器来实现对第一个元素的单独处理。本文将详细介绍如何使用CSS来处理第一个样式的方法,并提供多个示例代码供大家参考。
1. 使用:first-child伪类选择器
:first-child 伪类选择器可以选择父元素下的第一个子元素,并对其应用样式。下面是一个简单的示例代码:
<!DOCTYPE html>
<html lang="en">
<head>
<meta charset="UTF-8">
<meta name="viewport" content="width=device-width, initial-scale=1.0">
<title>First Child Example</title>
<style>
    p:first-child {
        color: red;
    }
</style>
</head>
<body>
    <p>sotoolbox.com - 第一个段落</p>
    <p>sotoolbox.com - 第二个段落</p>
    <p>sotoolbox.com - 第三个段落</p>
</body>
</html>
代码运行结果:

在上面的示例中,我们使用 :first-child 伪类选择器选择了第一个 <p> 元素,并将其文字颜色设置为红色。运行该代码,可以看到第一个段落的文字颜色变为红色。
2. 使用:first-of-type伪类选择器
:first-of-type 伪类选择器可以选择父元素下的第一个指定类型的子元素,并对其应用样式。下面是一个示例代码:
<!DOCTYPE html>
<html lang="en">
<head>
<meta charset="UTF-8">
<meta name="viewport" content="width=device-width, initial-scale=1.0">
<title>First of Type Example</title>
<style>
    p:first-of-type {
        font-weight: bold;
    }
</style>
</head>
<body>
    <p>sotoolbox.com - 第一个段落</p>
    <div>
        <p>sotoolbox.com - 第一个div中的段落</p>
        <p>sotoolbox.com - 第二个div中的段落</p>
    </div>
    <p>sotoolbox.com - 第二个段落</p>
</body>
</html>
代码运行结果:
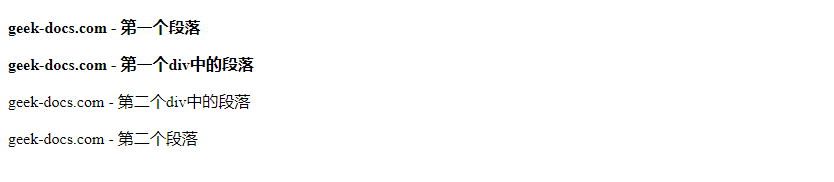
在上面的示例中,我们使用 :first-of-type 伪类选择器选择了第一个 <p> 元素,并将其字体加粗。运行该代码,可以看到第一个段落的文字变为加粗。
3. 使用:first-letter伪元素选择器
:first-letter 伪元素选择器可以选择元素的第一个字母,并对其应用样式。下面是一个示例代码:
<!DOCTYPE html>
<html lang="en">
<head>
<meta charset="UTF-8">
<meta name="viewport" content="width=device-width, initial-scale=1.0">
<title>First Letter Example</title>
<style>
    p:first-letter {
        color: blue;
        font-size: 24px;
    }
</style>
</head>
<body>
    <p>sotoolbox.com - 第一个段落</p>
</body>
</html>
代码运行结果:

在上面的示例中,我们使用 :first-letter 伪元素选择器选择了第一个段落的第一个字母,并将其颜色设置为蓝色,字体大小设置为24px。运行该代码,可以看到第一个段落的第一个字母变为蓝色且字体变大。
4. 使用:nth-of-type伪类选择器
:nth-of-type 伪类选择器可以选择父元素下指定类型的子元素,并对其应用样式。下面是一个示例代码:
<!DOCTYPE html>
<html lang="en">
<head>
<meta charset="UTF-8">
<meta name="viewport" content="width=device-width, initial-scale=1.0">
<title>Nth of Type Example</title>
<style>
    p:nth-of-type(2) {
        background-color: lightgray;
    }
</style>
</head>
<body>
    <p>sotoolbox.com - 第一个段落</p>
    <p>sotoolbox.com - 第二个段落</p>
    <p>sotoolbox.com - 第三个段落</p>
</body>
</html>
代码运行结果:

在上面的示例中,我们使用 :nth-of-type(2) 伪类选择器选择了第二个 <p> 元素,并将其背景颜色设置为浅灰色。运行该代码,可以看到第二个段落的背景颜色变为浅灰色。
5. 使用:first-line伪元素选择器
:first-line 伪元素选择器可以选择元素的第一行,并对其应用样式。下面是一个示例代码:
<!DOCTYPE html>
<html lang="en">
<head>
<meta charset="UTF-8">
<meta name="viewport" content="width=device-width, initial-scale=1.0">
<title>First Line Example</title>
<style>
    p:first-line {
        text-transform: uppercase;
    }
</style>
</head>
<body>
    <p>sotoolbox.com - 这是第一个段落,这是第一个段落,这是第一个段落。</p>
</body>
</html>
代码运行结果:

在上面的示例中,我们使用 :first-line 伪元素选择器选择了第一个段落的第一行,并将其文本转换为大写。运行该代码,可以看到第一个段落的第一行文字变为大写。
6. 使用:first-of-type和:nth-of-type结合
我们还可以结合使用 :first-of-type 和 :nth-of-type 来选择第一个指定类型的子元素中的第n个元素。下面是一个示例代码:
<!DOCTYPE html>
<html lang="en">
<head>
<meta charset="UTF-8">
<meta name="viewport" content="width=device-width, initial-scale=1.0">
<title>First of Type and Nth of Type Example</title>
<style>
    p:first-of-type:nth-of-type(2) {
        color: green;
    }
</style>
</head>
<body>
    <p>sotoolbox.com - 第一个段落</p>
    <p>sotoolbox.com - 第二个段落</p>
    <p>sotoolbox.com - 第三个段落</p>
</body>
</html>
代码运行结果:

在上面的示例中,我们使用 :first-of-type:nth-of-type(2) 结合选择了第一个 <p> 元素中的第二个元素,并将其文字颜色设置为绿色。运行该代码,可以看到第一个段落中的第二个段落文字变为绿色。
7. 使用:first-of-type和:not结合
我们还可以结合使用 :first-of-type 和 :not 来选择第一个指定类型的子元素中除了某些元素之外的元素。下面是一个示例代码:
<!DOCTYPE html>
<html lang="en">
<head>
<meta charset="UTF-8">
<meta name="viewport" content="width=device-width, initial-scale=1.0">
<title>First of Type and Not Example</title>
<style>
    p:first-of-type:not(:last-of-type) {
        font-style: italic;
    }
</style>
</head>
<body>
    <p>sotoolbox.com - 第一个段落</p>
    <p>sotoolbox.com - 第二个段落</p>
    <p>sotoolbox.com - 第三个段落</p>
</body>
</html>
代码运行结果:

在上面的示例中,我们使用 :first-of-type:not(:last-of-type) 结合选择了第一个 <p> 元素中除了最后一个元素之外的元素,并将其字体样式设置为斜体。运行该代码,可以看到第一个段落和第二个段落的文字变为斜体。
8. 使用:first-child和:nth-child结合
我们还可以结合使用 :first-child 和 :nth-child 来选择第一个子元素和第n个子元素。下面是一个示例代码:
<!DOCTYPE html>
<html lang="en">
<head>
<meta charset="UTF-8">
<meta name="viewport" content="width=device-width, initial-scale=1.0">
<title>First Child and Nth Child Example</title>
<style>
    p:first-child:nth-child(2) {
        text-decoration: underline;
    }
</style>
</head>
<body>
    <p>sotoolbox.com - 第一个段落</p>
    <p>sotoolbox.com - 第二个段落</p>
    <p>sotoolbox.com - 第三个段落</p>
</body>
</html>
代码运行结果:

在上面的示例中,我们使用 :first-child:nth-child(2) 结合选择了第一个子元素和第二个子元素,并将其文字添加下划线。运行该代码,可以看到第一个段落和第二个段落的文字下划线。
9. 使用:first-of-type和:last-of-type结合
我们还可以结合使用 :first-of-type 和 :last-of-type 来选择第一个指定类型的子元素和最后一个指定类型的子元素。下面是一个示例代码:
<!DOCTYPE html>
<html lang="en">
<head>
<meta charset="UTF-8">
<meta name="viewport" content="width=device-width, initial-scale=1.0">
<title>First of Type and Last of Type Example</title>
<style>
    p:first-of-type:last-of-type {
        background-color: lightblue;
    }
</style>
</head>
<body>
    <p>sotoolbox.com - 第一个段落</p>
    <p>sotoolbox.com - 第二个段落</p>
    <p>sotoolbox.com - 第三个段落</p>
</body>
</html>
代码运行结果:

在上面的示例中,我们使用 :first-of-type:last-of-type 结合选择了第一个 <p> 元素和最后一个 <p> 元素,并将其背景颜色设置为浅蓝色。运行该代码,可以看到第一个段落和最后一个段落的背景颜色变为浅蓝色。
10. 使用:first-of-type和:nth-last-of-type结合
我们还可以结合使用 :first-of-type 和 :nth-last-of-type 来选择第一个指定类型的子元素和倒数第n个指定类型的子元素。下面是一个示例代码:
<!DOCTYPE html>
<html lang="en">
<head>
<meta charset="UTF-8">
<meta name="viewport" content="width=device-width, initial-scale=1.0">
<title>First of Type and Nth Last of Type Example</title>
<style>
    p:first-of-type:nth-last-of-type(2) {
        color: purple;
    }
</style>
</head>
<body>
    <p>sotoolbox.com - 第一个段落</p>
    <p>sotoolbox.com - 第二个段落</p>
    <p>sotoolbox.com - 第三个段落</p>
</body>
</html>
代码运行结果:

在上面的示例中,我们使用 :first-of-type:nth-last-of-type(2) 结合选择了第一个 <p> 元素和倒数第二个 <p> 元素,并将其文字颜色设置为紫色。运行该代码,可以看到第一个段落和倒数第二个段落的文字颜色变为紫色。
此处评论已关闭