CSS鼠标变成小手
在网页设计中,鼠标指针的样式是一个很重要的元素,可以增强用户体验,提高页面的交互性。其中,将鼠标指针变成小手形状是一种常见的效果,通常用于提示用户某个元素是可点击的链接。在本文中,我们将详细介绍如何使用CSS来实现鼠标指针变成小手的效果。
1. 使用cursor属性
在CSS中,可以使用cursor属性来定义鼠标指针的样式。其中,pointer值表示小手形状,可以用于指示链接、按钮等可点击的元素。
示例代码如下:
<!DOCTYPE html>
<html lang="en">
<head>
<meta charset="UTF-8">
<title>Cursor Example</title>
<style>
    .link {
        cursor: pointer;
    }
</style>
</head>
<body>
    <a href="https://sotoolbox.com" class="link">Click me</a>
</body>
</html>
Output:

在上面的示例中,我们给链接元素添加了一个类名.link,并在CSS中定义了该类名的cursor属性为pointer,这样当鼠标悬停在链接上时,鼠标指针会变成小手形状。
2. 鼠标悬停效果
除了在链接上使用小手形状,我们还可以在其他元素上添加鼠标悬停效果,以增强用户体验。
示例代码如下:
<!DOCTYPE html>
<html lang="en">
<head>
<meta charset="UTF-8">
<title>Hover Effect Example</title>
<style>
    .box {
        width: 100px;
        height: 100px;
        background-color: #f0f0f0;
        transition: background-color 0.3s;
    }
    .box:hover {
        cursor: pointer;
        background-color: #ccc;
    }
</style>
</head>
<body>
    <div class="box"></div>
</body>
</html>
Output:

在上面的示例中,我们创建了一个灰色的正方形盒子,并在CSS中定义了鼠标悬停时的效果,即鼠标指针变成小手形状,并且盒子的背景颜色会在0.3秒内变成浅灰色。
3. 自定义小手形状
除了使用默认的小手形状外,我们还可以自定义小手的样式,以满足不同设计需求。
示例代码如下:
<!DOCTYPE html>
<html lang="en">
<head>
<meta charset="UTF-8">
<title>Custom Cursor Example</title>
<style>
    .custom-cursor {
        cursor: url('https://sotoolbox.com/images/custom-cursor.png'), auto;
    }
</style>
</head>
<body>
    <div class="custom-cursor">Hover me</div>
</body>
</html>
Output:

在上面的示例中,我们使用url()函数来指定自定义的小手图片,并将其应用到一个<div>元素上。当鼠标悬停在该元素上时,鼠标指针会变成自定义的小手形状。
4. 鼠标指针变成文本输入符号
除了小手形状外,我们还可以将鼠标指针变成文本输入符号,以提示用户某个元素是可编辑的文本框。
示例代码如下:
<!DOCTYPE html>
<html lang="en">
<head>
<meta charset="UTF-8">
<title>Text Input Cursor Example</title>
<style>
    .text-input {
        cursor: text;
    }
</style>
</head>
<body>
    <input type="text" class="text-input" placeholder="Type something...">
</body>
</html>
Output:

在上面的示例中,我们给文本输入框添加了一个类名.text-input,并在CSS中定义了该类名的cursor属性为text,这样当鼠标悬停在文本输入框上时,鼠标指针会变成文本输入符号。
5. 鼠标指针变成移动符号
在一些交互性较强的网页中,我们可以将鼠标指针变成移动符号,以提示用户某个元素是可拖动的。
示例代码如下:
<!DOCTYPE html>
<html lang="en">
<head>
<meta charset="UTF-8">
<title>Move Cursor Example</title>
<style>
    .draggable {
        cursor: move;
    }
</style>
</head>
<body>
    <div class="draggable" style="width: 100px; height: 100px; background-color: #f0f0f0;">Drag me</div>
</body>
</html>
Output:

在上面的示例中,我们给一个<div>元素添加了一个类名.draggable,并在CSS中定义了该类名的cursor属性为move,这样当鼠标悬停在该元素上时,鼠标指针会变成移动符号,提示用户可以拖动该元素。
6. 鼠标指针变成放大镜符号
在一些需要放大查看的网页中,我们可以将鼠标指针变成放大镜符号,以提示用户某个元素可以放大查看。
示例代码如下:
<!DOCTYPE html>
<html lang="en">
<head>
<meta charset="UTF-8">
<title>Zoom Cursor Example</title>
<style>
    .zoomable {
        cursor: zoom-in;
    }
</style>
</head>
<body>
    <img src="https://sotoolbox.com/images/zoomable-image.jpg" class="zoomable" alt="Zoomable Image">
</body>
</html>
Output:

在上面的示例中,我们给一个图片元素添加了一个类名.zoomable,并在CSS中定义了该类名的cursor属性为zoom-in,这样当鼠标悬停在该图片上时,鼠标指针会变成放大镜符号,提示用户可以放大查看该图片。
7. 鼠标指针变成缩小镜符号
与放大镜符号相反,我们还可以将鼠标指针变成缩小镜符号,以提示用户某个元素可以缩小查看。
示例代码如下:
<!DOCTYPE html>
<html lang="en">
<head>
<meta charset="UTF-8">
<title>Zoom Out Cursor Example</title>
<style>
    .zoom-out {
        cursor: zoom-out;
    }
</style>
</head>
<body>
    <img src="https://sotoolbox.com/images/zoomable-image.jpg" class="zoom-out" alt="Zoomable Image">
</body>
</html>
Output:

在上面的示例中,我们给同一个图片元素添加了一个类名.zoom-out,并在CSS中定义了该类名的cursor属性为zoom-out,这样当鼠标悬停在该图片上时,鼠标指针会变成缩小镜符号,提示用户可以缩小查看该图片。
8. 鼠标指针变成十字形符号
在一些需要进行精确定位的网页中,我们可以将鼠标指针变成十字形符号,以帮助用户进行准确的操作。
示例代码如下:
<!DOCTYPE html>
<html lang="en">
<head>
<meta charset="UTF-8">
<title>Crosshair Cursor Example</title>
<style>
    .crosshair {
        cursor: crosshair;
    }
</style>
</head>
<body>
    <div class="crosshair" style="width: 200px; height: 200px; border: 1px solid #000;">Click and drag</div>
</body>
</html>
Output:
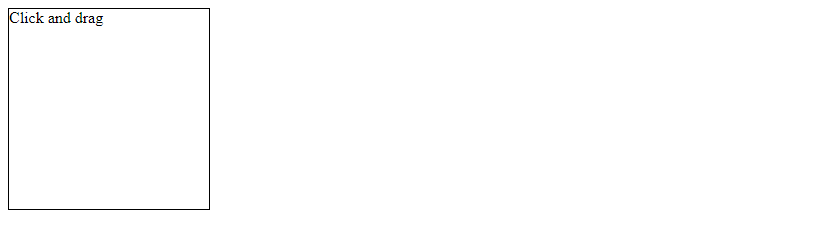
在上面的示例中,我们给一个<div>元素添加了一个类名.crosshair,并在CSS中定义了该类名的cursor属性为crosshair,这样当鼠标悬停在该元素上时,鼠标指针会变成十字形符号,帮助用户进行准确的操作。
9. 鼠标指针变成禁止符号
在一些需要进行警告提示的网页中,我们可以将鼠标指针变成禁止符号,以提示用户某个操作是不允许的。
示例代码如下:
<!DOCTYPE html>
<html lang="en">
<head>
<meta charset="UTF-8">
<title>Forbidden Cursor Example</title>
<style>
    .forbidden {
        cursor: not-allowed;
    }
</style>
</head>
<body>
    <button class="forbidden" disabled>Click me</button>
</body>
</html>
Output:

在上面的示例中,我们给一个禁用状态的按钮添加了一个类名.forbidden,并在CSS中定义了该类名的cursor属性为not-allowed,这样当鼠标悬停在该按钮上时,鼠标指针会变成禁止符号,提示用户该按钮是禁用状态,不允许点击。
10. 鼠标指针变成等待符号
在一些需要加载时间较长的网页中,我们可以将鼠标指针变成等待符号,以提示用户页面正在加载中。
示例代码如下:
<!DOCTYPE html>
<html lang="en">
<head>
<meta charset="UTF-8">
<title>Wait Cursor Example</title>
<style>
    .wait {
        cursor: wait;
    }
</style>
</head>
<body>
    <button class="wait" disabled>Loading...</button>
</body>
</html>
Output:

在上面的示例中,我们给一个禁用状态的按钮添加了一个类名.wait,并在CSS中定义了该类名的cursor属性为wait,这样当鼠标悬停在该按钮上时,鼠标指针会变成等待符号,提示用户页面正在加载中。
此处评论已关闭